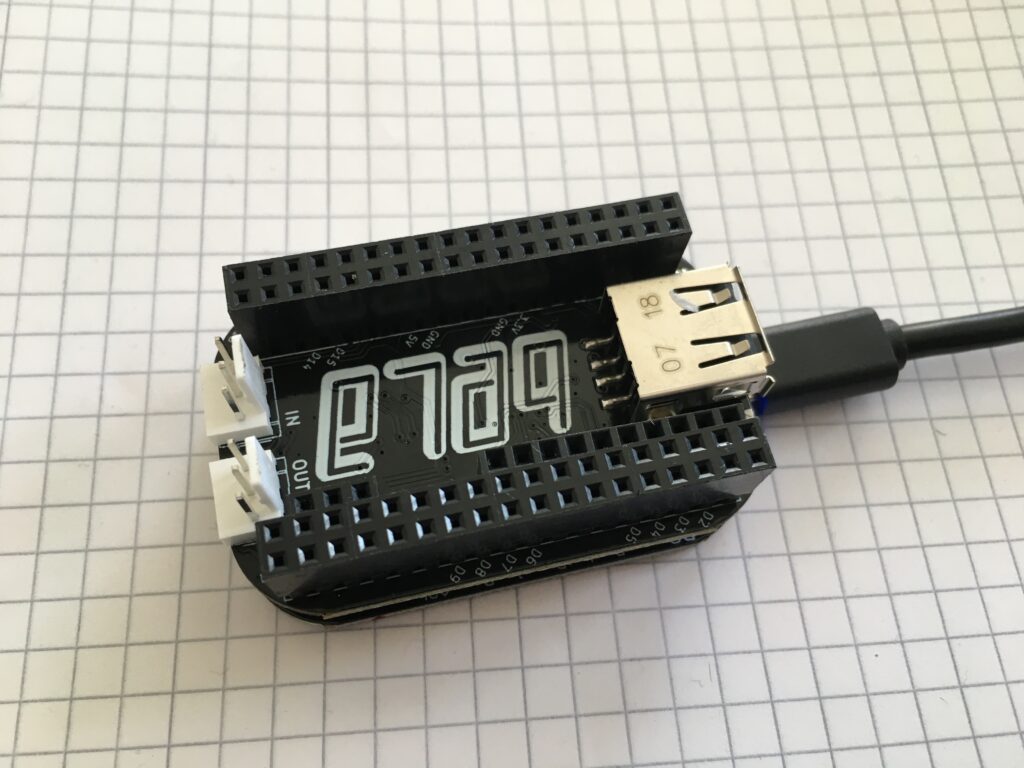
Bela Mini Board (https://bela.io/) is a super nice tool to read textile sensors, and generate sound on board. Bela can run Pure Data, and this is becoming my favorite toolset. One problem of working with Bela is that it does not have monitor, so you can not easily see in realtime what value your sensor is reading, or to tweak the adjustment. For this, RabbitControl protocol (https://rabbitcontrol.cc/) become very handy.
In this post, I follow the steps of how to install Rabbit Control for PD on you computer, and to install RabbitControl for PD on Bela, then how to use them. Overall, Rabbit Control resources are found here >> https://github.com/rabbitControl/rcp-flext
If you are new to Bela platform and want to know how to start using them, Bela has a very nice tutorials >> https://learn.bela.io/get-started-guide/
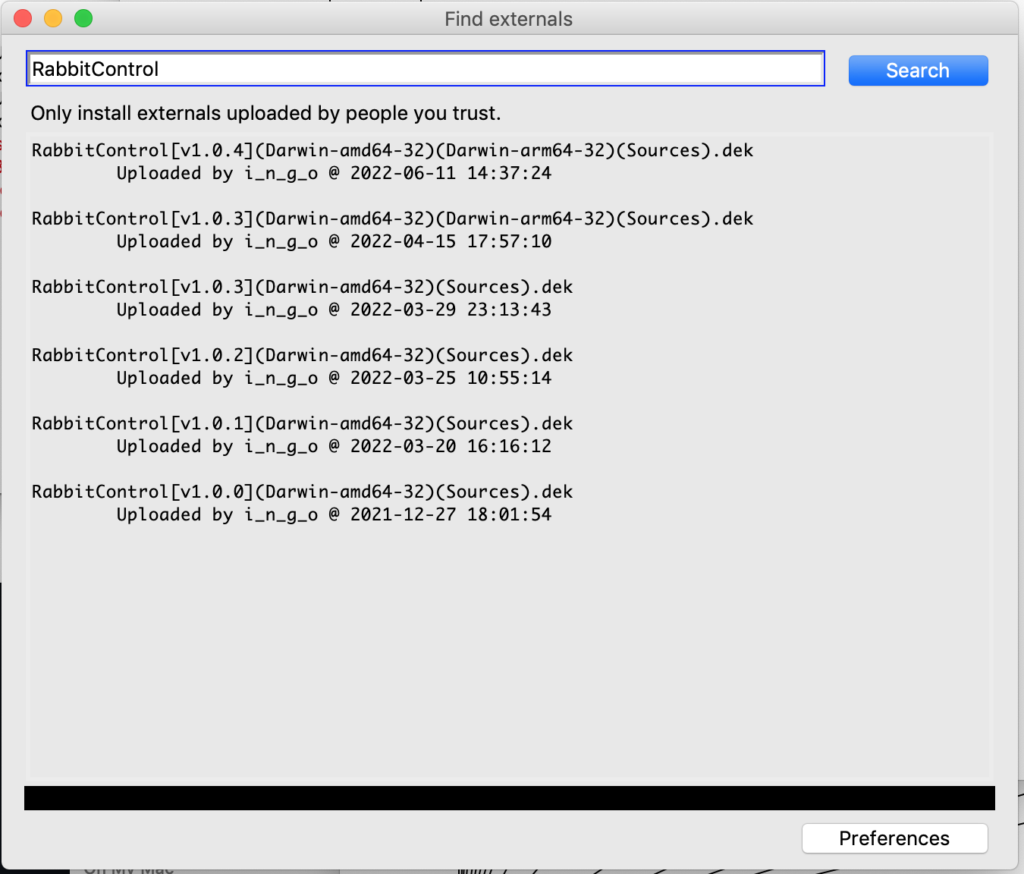
Open Pure Data on your computer. I am using Vanilla. Go to help/find externals. in the find externals window, type “RabbitControl” and it should find the latest version. click to install.
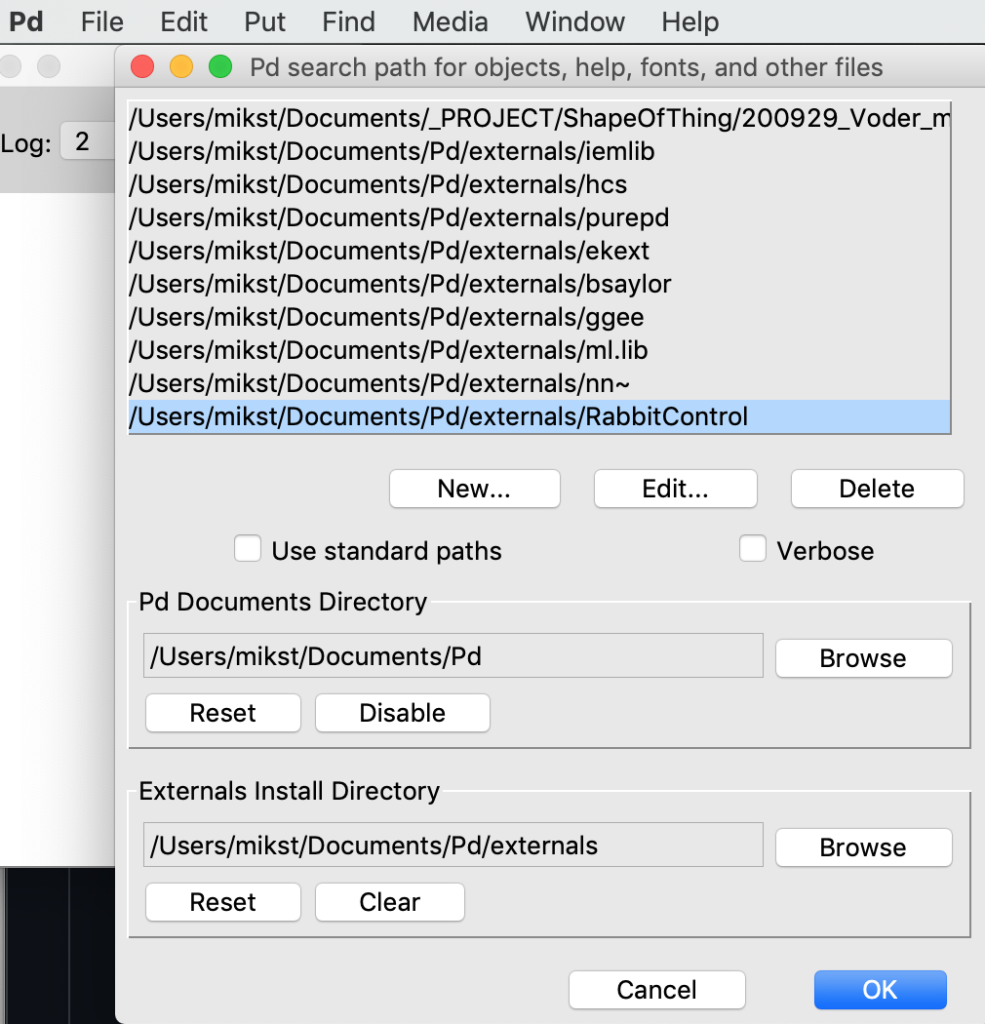
Now you have to set the path to the installed externals. Go to Pd/Preferences/path… then add the path to the installed files. If you did not change the default, it is in your Document/Pd/externals/RabbitControl
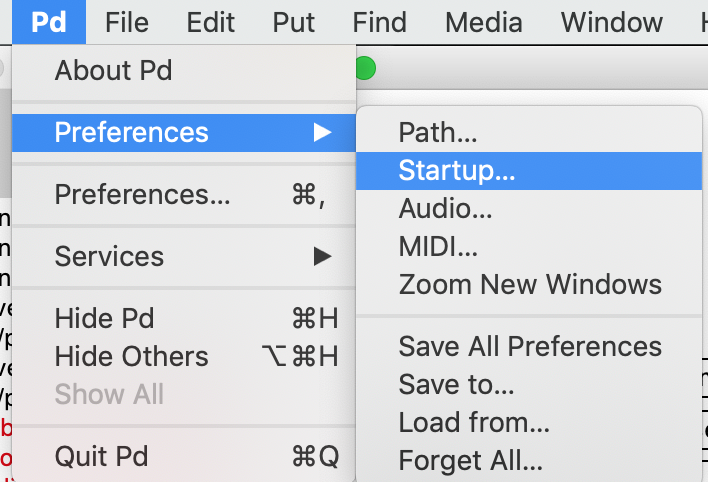
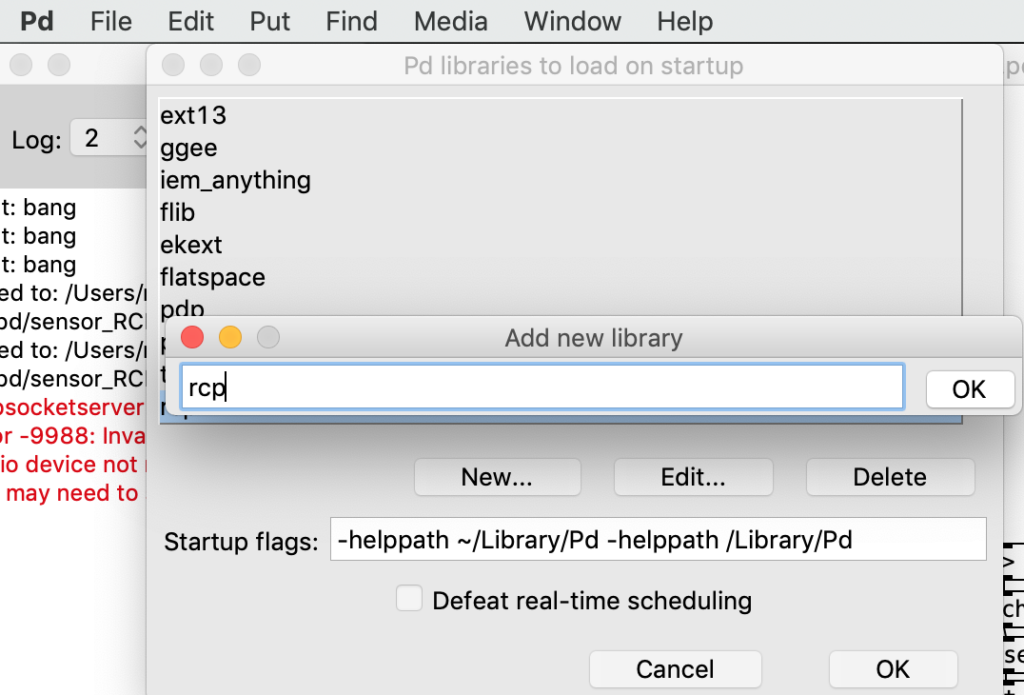
Because RabbitControl is a library, you will need to add it to the startup so the library is loaded when the PD starts up. Go to preference/Startup…
when the start up window opens, press “new” and add “rcp”. rcp is a short name of “rabbit control protocol”, and this is how the library is named. Don’t ask why;) when rcp is added to startup, you can restart the PD.
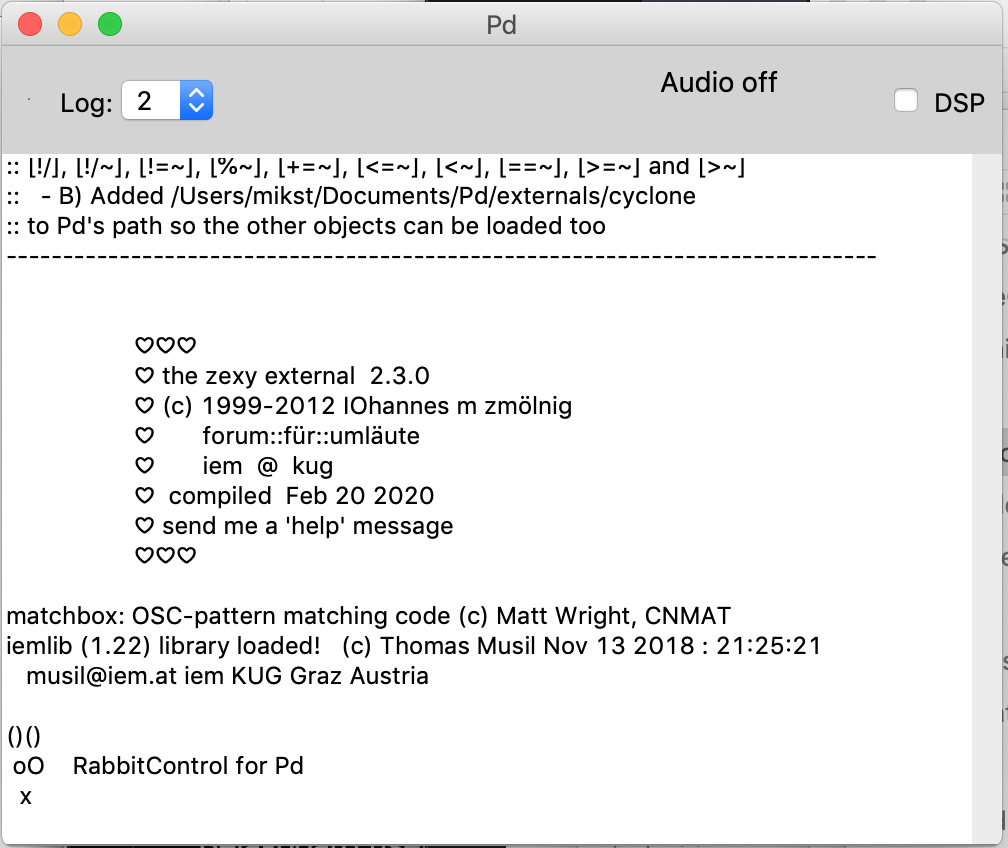
When you restart the PD, you will see the Rabbit control logo on the PD window. This indicates that RCP library is successfully loaded. Now you are ready to go.
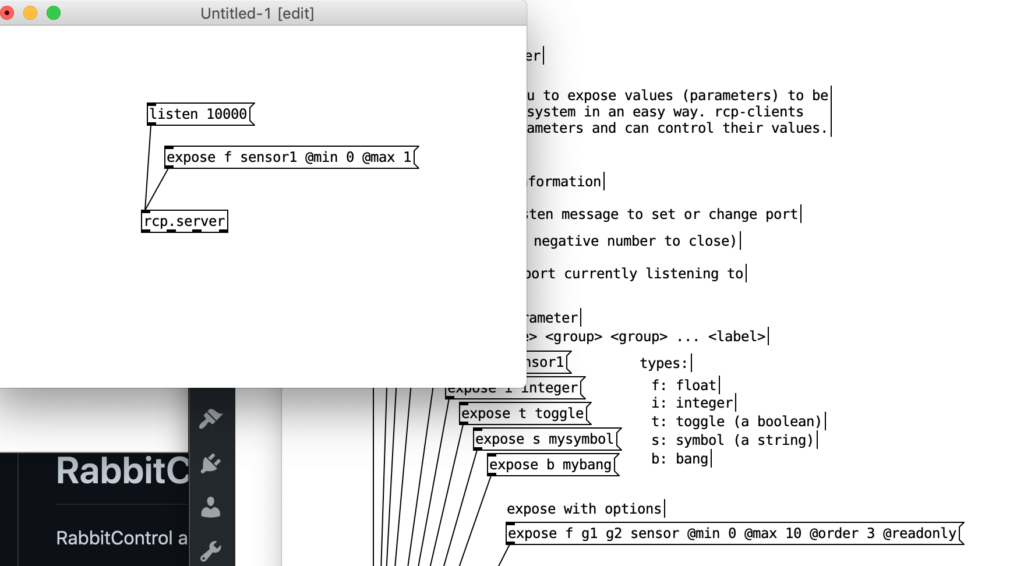
Open a new patch and make an object (cmd 1) “rcp.server”. If the installation is successful, it should create the object. If not, it shows the object with dotted line. if this happens, make sure that your externals path is correct. If you right click the rcp.server object and open help file, it explains what you can do with them. In this example, I open port 10000 and expose one value called sensor1 that has minimum0 and max1 range.
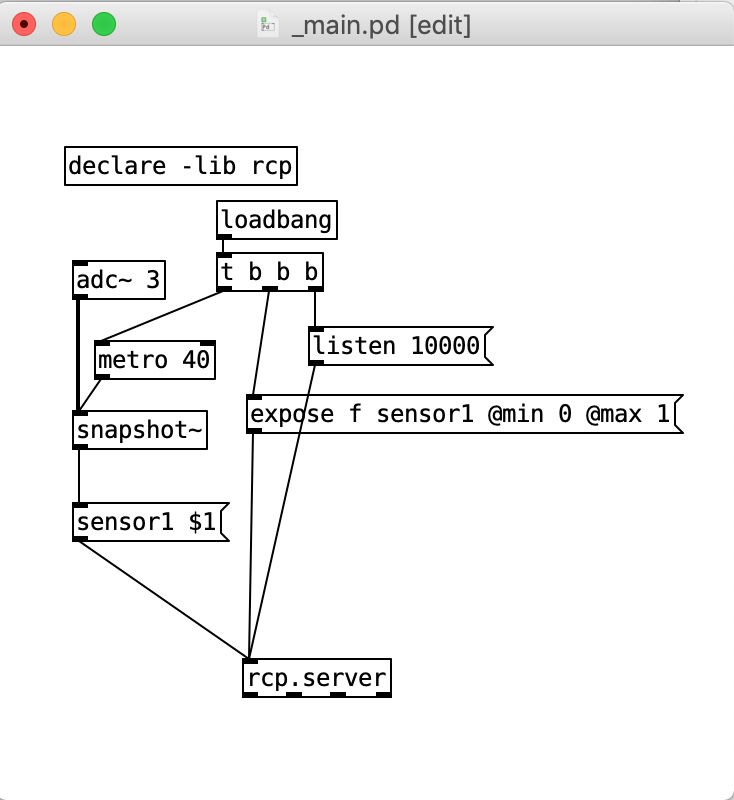
now, I want to run this on Bela, so I add few more object to set up the server and activate expose value with [loadbang], read one sensor and expose that value. Add the declare object [declare -lib rcp] so the Bela can find the rcp library. Save the patch as _main.pd
now we go to Bela side. First, we download the RabbitControl PD externals for Bela. Go to https://github.com/rabbitControl/rcp-flext scroll down to “Prebuilt Binaries” for Bela board and download the zip file. unzip the file somewhere in your computer.
Open terminal window, and ssh to Bela. Make sure that your Bela is connected via USB and it is already booted. Type in to the terminal window (if you are windows user, the address maybe 192.168.6.2, or you can also use the address root@bela.local)
$ ssh root@192.168.7.2Then you will see that you enter the Bela
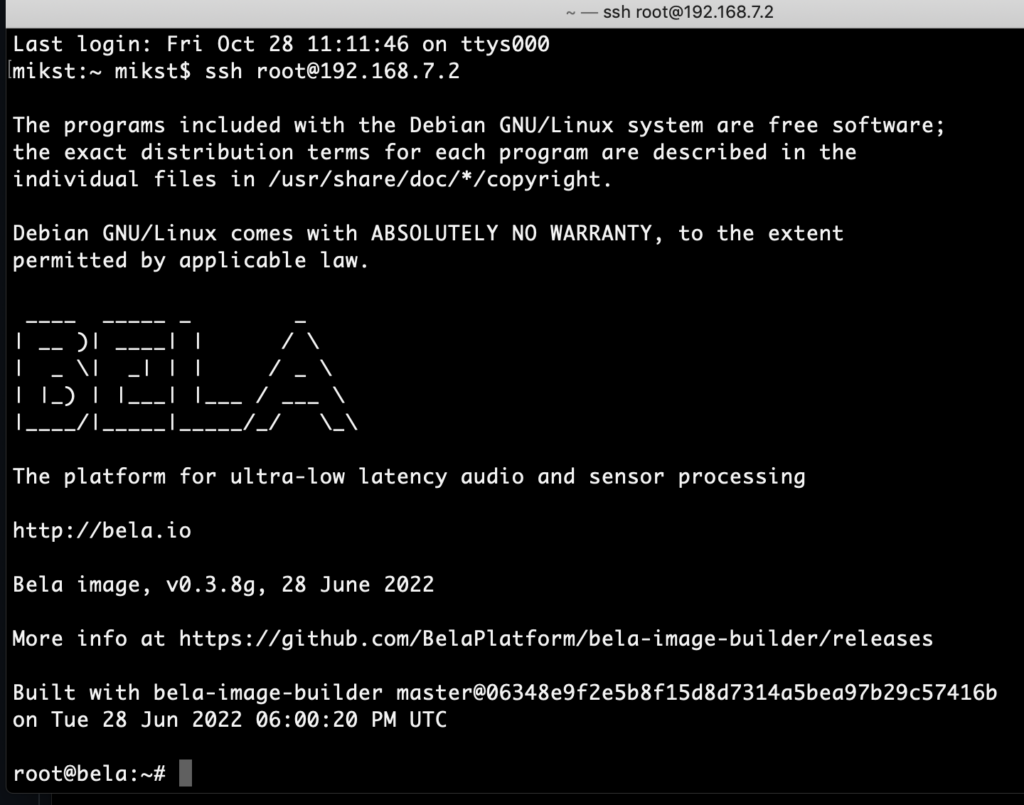
now we change directly to Bela/projects. Type in:
# cd Bela/projects now we make a new directory called “pd-externals” the name of this directory must be exactly this, as it is set internally that it automatically look into this name for externals. Type in
# mkdir pd-externalsThis should have made pd-externals folder in your projects directly. you can type “ls” and see what is in the projects directly. Do you see “pd-externals”?
Now, open browser window (firefox, chrome… whatever you like) on your computer. type in address bela.local (or 192.168.7.2). It should open Bela control window.
from “your projects” drop down menu, you see “pd-externals” folder. select this and it opens the folder on browser. Probably it gives some error message, but just ignore.
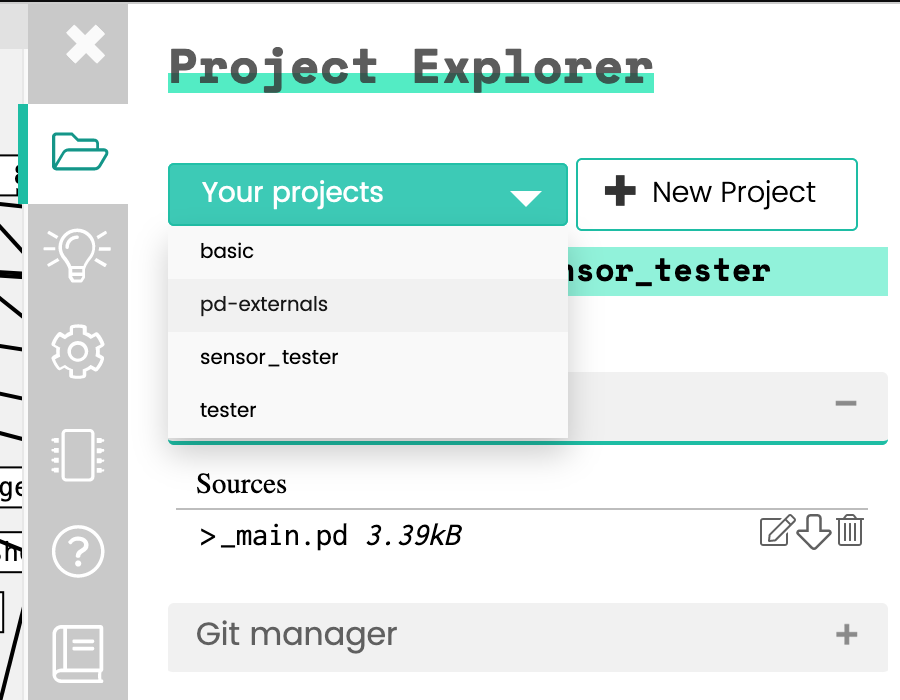
Now drop all the dwonloaded and upzipped Rabbit Control externals content to the browser. it upload all the files into this pd-externals folder.
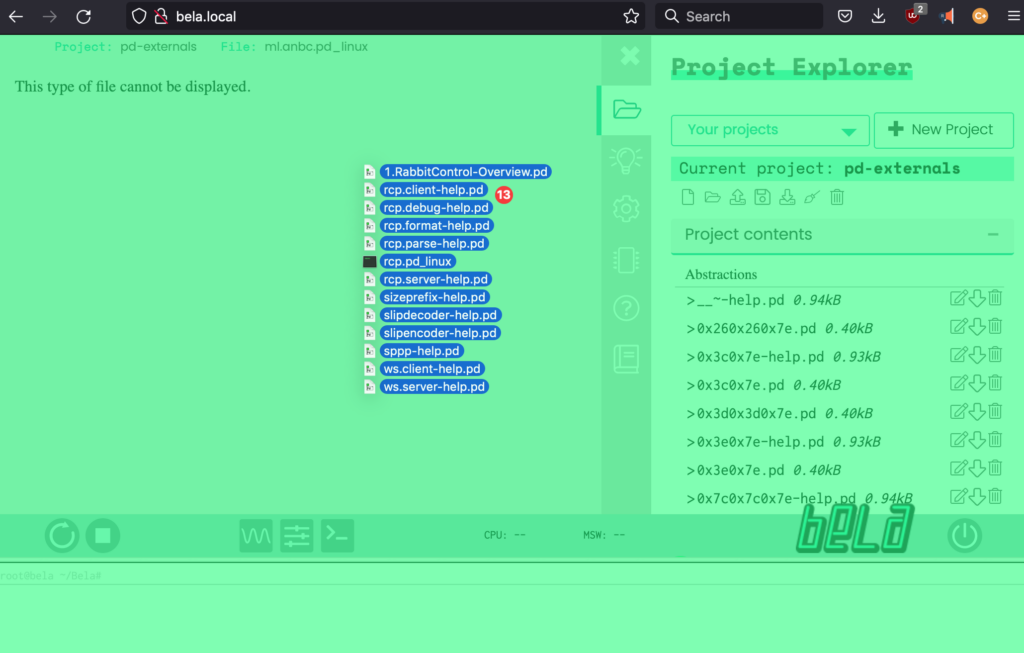
you can also add other externals here. For example, cyclone externals are very useful. here I found some tutorials >> https://www.youtube.com/watch?v=CydZ8v95_ok
you can find some compiled pd externals for Bela here >> https://github.com/BelaPlatform/Bela/issues/621
Once you have the externals on Bela, let’s test the PD patch we created. Make a new PD project on Bela, call it “sensor_RCP”. open it and upload the _main.pd patch we created above. now run the patch on Bela.
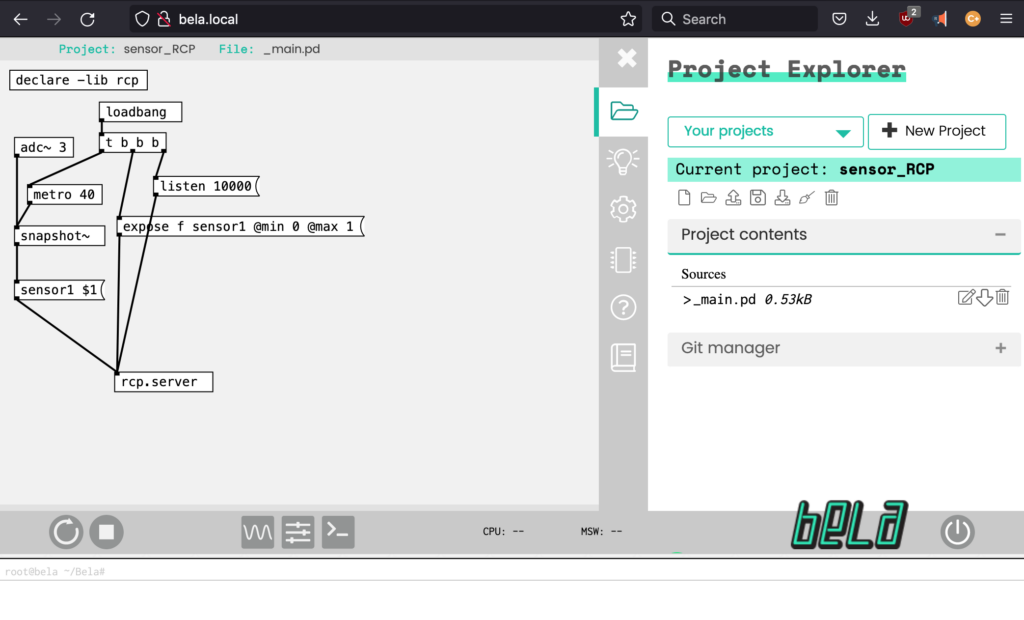
You may need to increase the block size as Rabbit Control takes some calculation. otherwise you may see the warning of on the console.
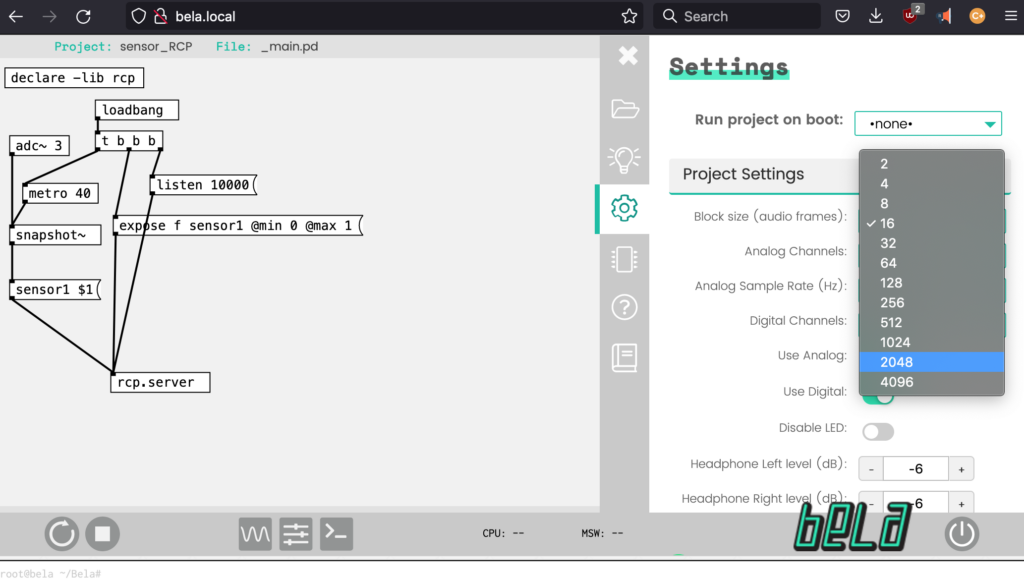
While the patch is running on the Bela, go to http://client.rabbitcontrol.cc/ (or if you installed rabbit control client on the Bela webserver, go to bela.local/client, see this post for details) and type in the host as 192.168.7.2
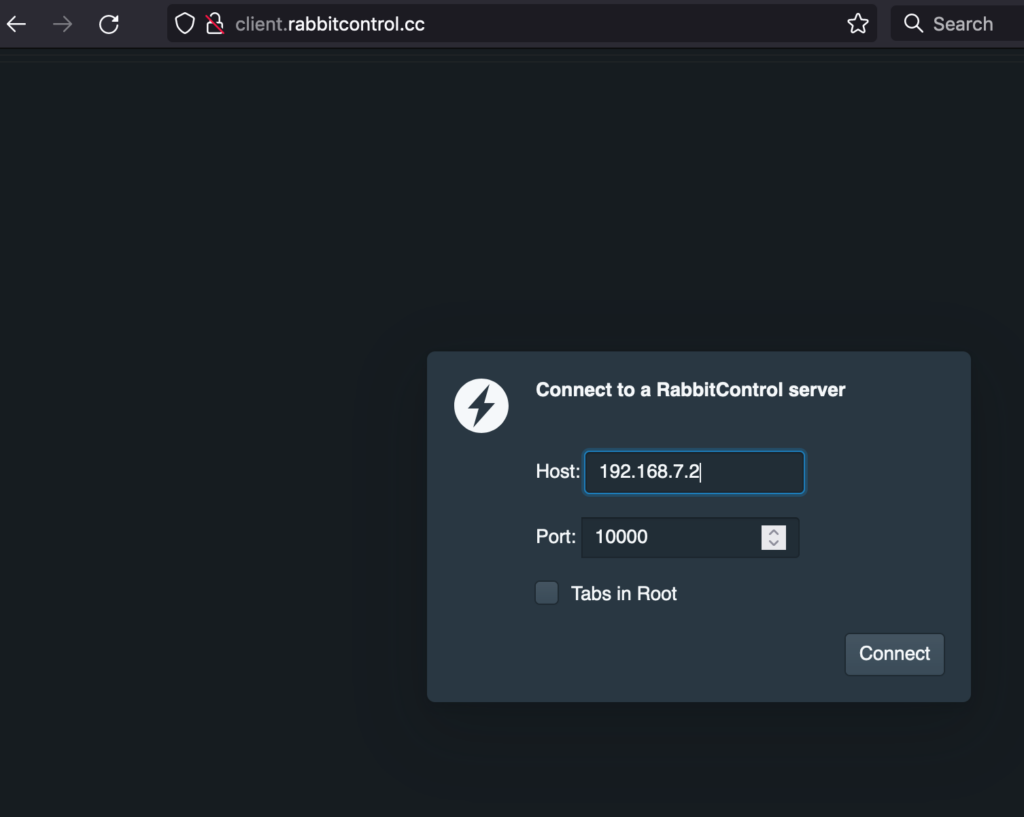

now you can see the sensor data on your browser. This becomes very handy if you want to monitor what your sensor is doing. you can also do this if you add wifi dongle to Bela and do it via wifi/wireless. To connect Bela with wifi, please see this tutorial from Bela >> https://learn.bela.io/using-bela/bela-techniques/connecting-to-wifi/
Here is another example on Bela+PD+RabbitControl:
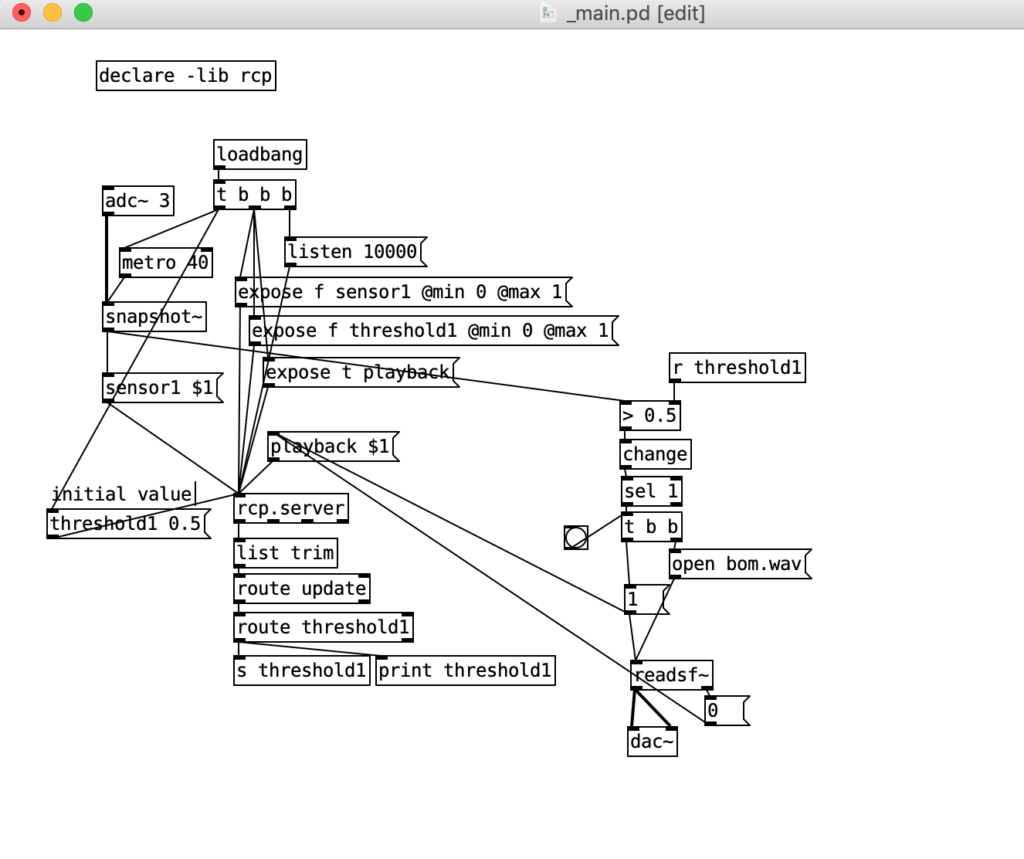

This example reads A0 pin, compare with threashold1 value (initially 0.5, but you can change it from Rabbit Control). When the sensor value is bigger than threshold value, it plays back the bom.wav sound file. Toggle on RabbitControl window shows the playback status of the sound file.







Leave a comment